Foshan Mingjun Textile Company Ltd.


+86-19867233023
Views: 0 Author: Site Editor Publish Time: 2025-08-16 Origin: Site
Want to know how to tie dye socks at home in easy steps? You can create bright, one-of-a-kind socks with this easy diy guide. This step-by-step guide uses easy-to-find materials, so you’ll feel confident from your first step. Tie-dye socks make a fun family project. Kids love easy tie dye socks because they get to play with colors and patterns. Parents enjoy how tie dye socks help children develop fine motor skills, patience, and creativity. You’ll find tie-dye tutorials easy to follow, and every step feels like a new adventure. Before you start your diy tie dye socks, get your space ready:
Pick a flat surface for your tie dye project.
Cover it with a plastic tablecloth or old sheet.
Set out paper towels for quick cleanup.
With these easy steps, you’re ready to learn how to tie dye, try new tie-dye socks patterns, and have fun together. This is how to tie dye at home—simple, creative, and perfect for everyone!
Get all the things you need first. You need white cotton socks, fiber-reactive dyes, rubber bands, and soda ash. Make sure you have everything before you start.
Wash your socks before you begin. Soak them in soda ash solution. This helps the dye stick better. Your socks will have bright colors that last longer.
Try different ways to fold and tie your socks. You can use spiral, scrunch, accordion, or bullseye methods. These ways make cool and different patterns on your socks.
Put the dye on your socks in small areas. Be careful so the colors do not mix too much. Let the socks stay damp for 8 to 24 hours. This helps the dye set well.
Wash your tie-dye socks by themselves in cold water. Use a gentle soap. Let them air dry away from sunlight. This keeps the colors bright for a long time.
Before you start, you need to gather the right tie dye supplies. Having everything ready makes the process smooth and fun. Here’s a list of supplies needed to tie dye socks at home:
White socks (at least 75% cotton, but 100% cotton socks work best)
Fiber-reactive dyes (like Procion MX or Tulip One-Step kits)
Rubber bands or string for tying
Squeeze bottles for applying dye
Soda ash (helps the dye bond to the fabric)
Gloves to protect your hands
Plastic tablecloth or trash bags to cover your workspace
Paper towels for quick cleanups
Laundry detergent (like Synthrapol) for prewashing
Tip: Always use gloves and cover your workspace to keep things safe and tidy.
Choosing the right socks makes a big difference in your results. Cotton absorbs dye well and gives you bright, bold colors. Here’s what to look for:
White socks with at least 75-80% cotton content
100% cotton socks for the brightest tie dye socks
Bamboo socks as a natural fiber alternative
Avoid socks with lots of polyester or nylon—they don’t hold color well
Light-colored socks (like pale gray or cream) work, but colors will look softer
White socks are the classic choice for tie dye socks. They give you a blank canvas for your designs.
You can add a few extras to make your tie dye socks even better. These items help with color, setting, and cleanup.
| Optional Extra | What It Does |
|---|---|
| ColorStay Dye Fixative | Makes colors brighter and helps them last longer |
| Salt | Helps the dye soak into the socks better |
| Microwave Heat Setting | Speeds up the dye setting process for more vibrant colors |
| Wire Rack | Lifts socks off the table so dye doesn’t pool underneath |
| Zip-Top Bags/Plastic Wrap | Keeps socks damp while the dye sets, making colors more even |
Note: Using reusable or biodegradable supplies helps protect the environment and keeps your tie dye project eco-friendly.
Start your easy tie-dye socks adventure by prepping the socks. This step helps you get bright, even colors. First, pre-wash your socks to remove dirt, oils, and chemicals. Use socks with high cotton content for the best results. Slightly damp socks work best for dyeing the socks because they absorb dye evenly and blend colors smoothly. Wring out the socks so they are damp, not wet. Set up a clean workspace and put on gloves. This step keeps your tie dye project safe and easy.
Tip: If your socks look patchy after dyeing, you may have skipped pre-washing or used dry socks. Always start with damp socks for even dye absorption.
Soaking socks in soda ash is an easy way to make colors last longer. Mix one cup of soda ash with a gallon of warm water. Soak the socks for 15-20 minutes. Wring out extra liquid, but don’t rinse. This step helps the dye bond to the fibers and keeps colors vibrant.
Warning: Don’t soak for too long. Soda ash can weaken the fabric if left too long. Use gloves to avoid skin irritation.
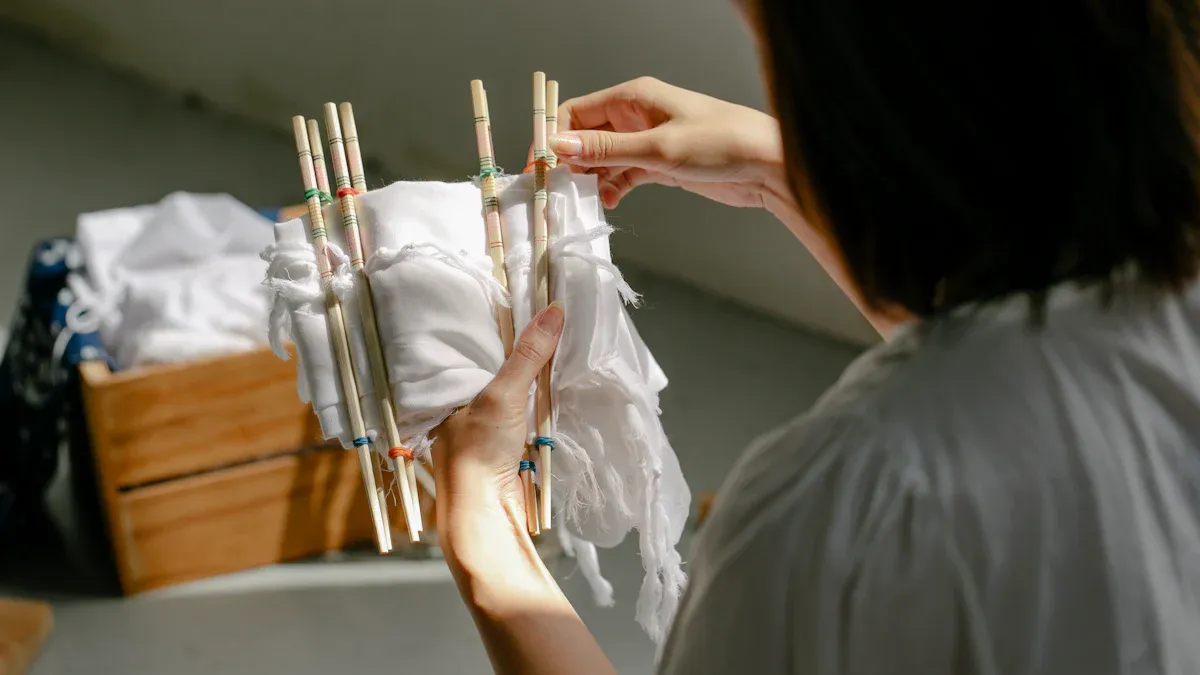
Now comes the fun part! Try different folding techniques for unique tie-dye socks patterns. Scrunch, spiral, or stripe—each method gives a new look. Use multiple rubber bands for intricate designs, but don’t tie too tightly. This step-by-step guide makes folding easy.
Tip: If your pattern looks messy, check your rubber bands. Loose bands give softer lines. Tight bands may damage the socks.
Apply dye slowly and in small amounts for better control. Use squeeze bottles for easy dyeing the socks. Don’t overlap too many colors, or you’ll get brown patches. Tutorials show how to tie dye socks with cool color combos.
Warning: Overlapping colors can create muddy spots. Apply dye in sections for clear patterns.
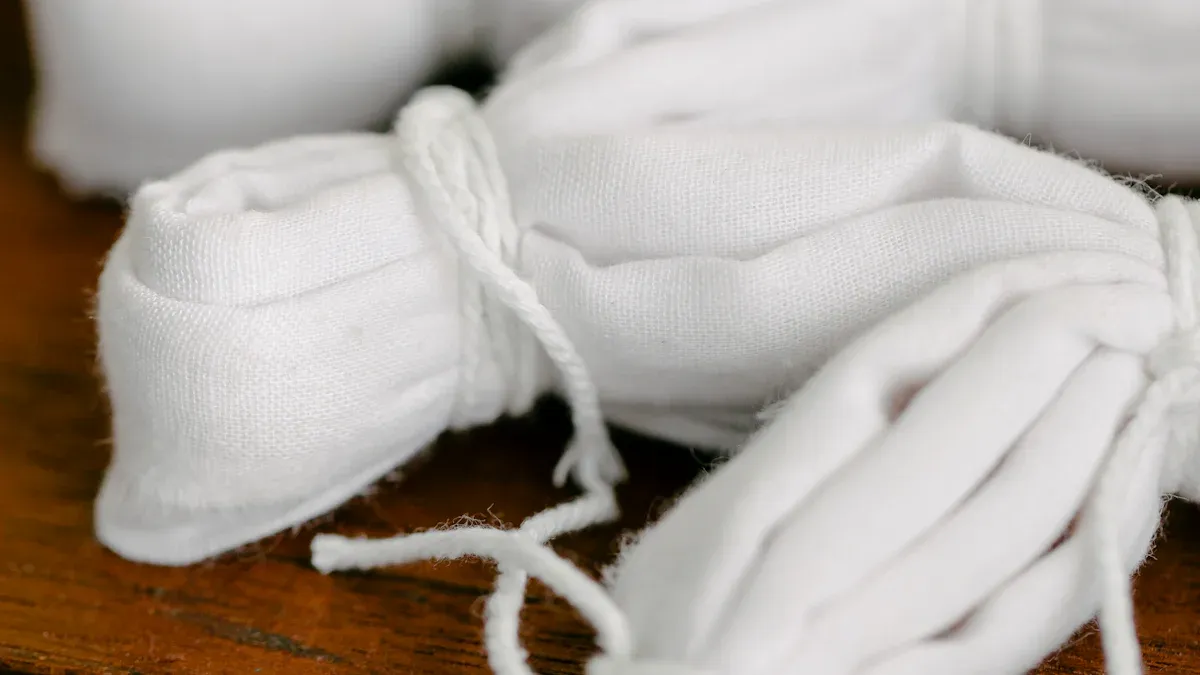
After you dye the socks, wrap them in plastic or put them in a bag. Let them sit for 8-24 hours. The longer you wait, the brighter the colors. Keep socks damp during this step.
Warning: If socks dry out, the dye may not set. Check that socks stay damp while waiting.
Rinse socks in cold water until the water runs clear. Wash each pair separately for the first few washes. Use mild detergent. This step keeps colors from bleeding.
Warning: Don’t wash with other clothes at first. Dye may bleed and stain other items.
Dry socks in a shaded area to prevent fading. Don’t wring out the socks—just lay them flat or hang them.
Tip: Wringing can distort your pattern. Air dry for best results.
Ready to try some easy fun patterns? Tie-dye socks come alive with a few classic tie-dye patterns. You can mix and match these designs to make your socks stand out. Kids and adults both love these styles because they are simple, creative, and always turn out unique.
The spiral pattern is a favorite for tie-dye socks. You get a classic swirl that starts in the center and spins outward. This look gives your socks a lively, playful vibe. Many people call it the swirl or cinnamon bun pattern, and it’s popular with all ages.
Lay your sock flat on your work surface.
Pinch the center of the sock.
Twist the sock in a circular motion until it forms a tight disk.
Secure the disk with 3-4 rubber bands, making wedge-shaped sections.
Apply different dye colors to each wedge for a bold spiral effect.
Tip: Try using bright colors for a more eye-catching spiral!
The scrunch pattern gives your tie-dye socks a cool, marbled look. You don’t need to follow any strict rules, so it’s perfect if you want to get creative and have fun.
Lay the sock flat.
Scrunch small sections of the fabric randomly.
Keep scrunching and folding until the sock forms a tight, flat disk.
Wrap several rubber bands around the disk to hold its shape.
Apply dye in any colors you like.
This method lets you play with color placement and create a one-of-a-kind design every time.
Accordion fold tie-dye socks show off bold stripes or zig-zags. This technique uses back-and-forth folds to make strong lines on your socks.
Lay the sock flat.
Fold it back and forth in a zigzag, like an accordion, from toe to cuff.
Wrap rubber bands around the folded sock at intervals.
Apply different dye colors to each section between the bands.
You’ll see clear stripes or zig-zags when you unfold your socks. Try different color combos for a unique look.
The bullseye pattern creates rings of color that pop on your tie-dye socks. This style looks great and is easy to do.
Pinch the sock where you want the center of the bullseye.
Pull the sock upward to form a tube shape.
Place rubber bands at intervals along the length of the tube.
Apply different dye colors between the bands for concentric rings.
Note: Avoid putting colors that mix into brown next to each other for the best results.
With these tie-dye patterns, you can turn plain socks into wearable art. Try them all and see which one you like best!
Choosing the right colors makes your tie-dye socks pop. If you want socks that stand out, try these color combinations:
Red, blue, and yellow give you a bright, energetic look.
Red and blue together create bold contrast, perfect for festival styles.
Blue and yellow remind you of sunny days at the beach.
Red and yellow look like a fiery sunset.
Rainbow patterns use every color for a classic, swirling effect.
Purple, pink, and blue bring a fun, psychedelic vibe.
Tip: Use colors that contrast or complement each other for the most eye-catching results. Let your socks dry fully before wearing them to keep the colors bright.
No one likes blotchy socks. You want your patterns to look smooth and even. Here are some easy tips to help you avoid blotches:
Dissolve your dye completely before using it. Warm up the dye if you see clumps.
Pre-wet your socks in cool or warm water. This helps the dye spread evenly.
Always pre-wash your socks with hot water and detergent to remove oils or residue.
Don’t crowd your socks in the dye bath. Give them space so the dye can move around.
Raise the temperature slowly after adding dye and socks.
Stir gently and often to keep the heat even.
Add vinegar only after the dye has soaked in and the water is warm. Stir well.
Tip: These steps help your socks show off crisp, clean patterns every time.
Tie-dye is fun, but you need to stay safe. Here are some important safety tips:
Wear gloves to protect your hands from stains and irritation.
Work in a well-ventilated area. If you use dye powders, wear a mask.
Put on old clothes or an apron to avoid stains.
Cover your workspace with plastic or old towels.
Keep dyes and chemicals away from kids and pets.
Clean up spills right away with a damp cloth.
Wash your hands well after you finish.
Remember: Always use separate tools for dyeing. Never use kitchen utensils for your tie-dye project.
With these tips, you can enjoy making bright socks with cool patterns and keep your space clean and safe.
You just finished your tie-dye socks, and now you want those colors to stay bright. The first wash is super important. If you follow these steps, your socks will look amazing for a long time:
Let your tie-dye socks sit for 8 to 24 hours at room temperature. This gives the dye time to set.
Rinse the socks under cold running water. Keep rinsing until the water runs clear. This removes extra dye.
Take off any rubber bands or strings.
Gently wring out the extra water.
Wash the socks by themselves or with other tie-dyed items. This helps stop color bleeding.
Use hot water and a dye-safe detergent like Synthrapol. Skip the fabric softener.
Run the wash cycle as usual.
Dry your socks on high heat in the dryer or let them air dry.
Tip: Always wash your tie-dye socks separately for the first few washes. This keeps the colors from staining other clothes.
Note: Vinegar does not help set tie-dye colors, so you can skip it.
You want your tie-dye socks to stay bright and fun. Here are some easy ways to keep them looking their best:
Pick socks made from 100% cotton. Natural fibers hold color better.
Always pre-wash socks before dyeing to remove any finishes.
Use high-quality, colorfast dyes for long-lasting results.
Rinse your socks well with cold water after dyeing.
Wash your socks gently with mild detergent and cold water. Hot water and harsh soaps can fade the colors.
Air dry your socks away from direct sunlight. Sunlight can make colors fade.
Only wash your socks when they really need it. Overwashing can dull the colors.
Store your socks in a cool, dry place.
If you want your socks to last, treat them gently. A little care goes a long way!
You can make every pair of tie-dye socks your own. Try new patterns and mix up your favorite colors. No two socks will ever look the same, so have fun with it!
Share your creations on TikTok, Instagram, or YouTube. You might inspire others, show off your style, and even join in on sock trends. Social media helps your socks get noticed and lets you connect with other creative people.
Practice makes your designs better each time. As you keep trying, you’ll learn new ways to fold, twist, and dye for awesome results.
Clean up your space when you finish, and don’t forget to show off your socks!
Let your socks sit for at least 8 hours. If you want brighter colors, wait up to 24 hours. Keep the socks damp during this time. The longer you wait, the more vibrant your socks will look.
Yes, you can skip soda ash, but the colors may not last as long. Some dye kits include soda ash in the dye powder. If you want the brightest, longest-lasting colors, use soda ash for best results.
Too many colors mixed together can make brown patches. Try using fewer colors next time. Keep similar colors together. Clean your gloves and workspace between colors to avoid unwanted mixing.
You can, but the colors will not show up well. Tie-dye works best on white or light-colored socks. If you want bold designs, always start with a light base.
Wash your socks in cold water. Use a gentle detergent. Avoid bleach and fabric softener. Air dry your socks out of direct sunlight. These steps help your colors stay bright and bold.


